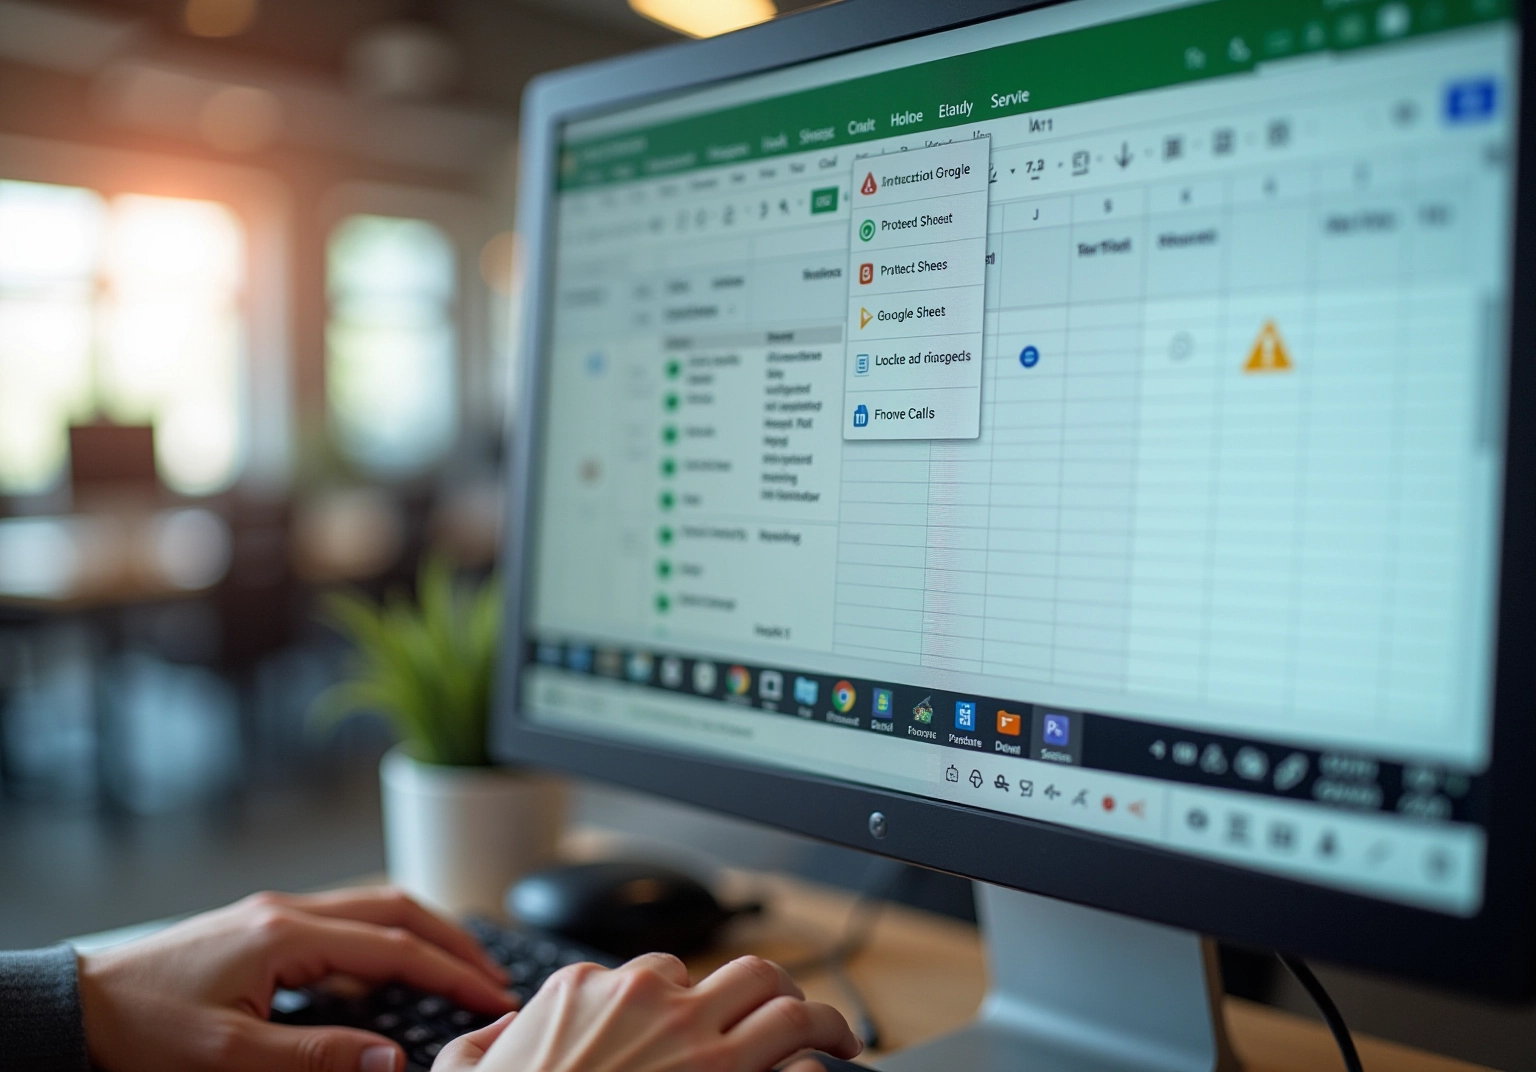
Overview
You might be wondering how to lock cells in Google Sheets to keep those pesky unauthorized edits at bay. Well, you’re in luck! This is super important for maintaining data integrity, especially when you’re collaborating with others. The article dives into various methods for locking cells, setting permissions, and even troubleshooting common hiccups. By following these practices, you can enhance teamwork, safeguard critical information, and minimize those accidental changes that can drive you crazy. So, let’s explore how to keep your data safe and sound!
Key Highlights:
- Locking cells in Google Sheets protects specific areas from unauthorised changes, enhancing data integrity during collaboration.
- Nearly 30% of users employ device protection to secure data in teamwork settings.
- Methods to lock cells include using the menu, right-click options, or keyboard shortcuts.
- Setting permissions allows users to control who can edit locked cells, with options for complete or custom access.
- Common issues include access rights not saving, locked areas still editable, and changes not reflecting due to version control problems.
- Regularly reviewing permissions and using descriptive labels for locked ranges improves security and communication.
- Training team members on the locking feature is crucial for maintaining information integrity in collaborative environments.
- Backing up essential information ensures quick restoration in case of accidental changes, safeguarding data integrity.
Introduction
In collaborative environments, protecting data integrity is super important, especially when multiple users are editing shared documents. You might be wondering how to keep everything accurate and untouched. Well, Google Sheets has a handy feature that lets you lock specific cells from editing, which is a game changer for maintaining critical information.
But here’s the kicker: many users find it tricky to set up these protections effectively. So, how can teams tackle the complexities of cell locking to boost collaboration while keeping their data safe? Let’s dive in!
Understand Cell Locking in Google Sheets
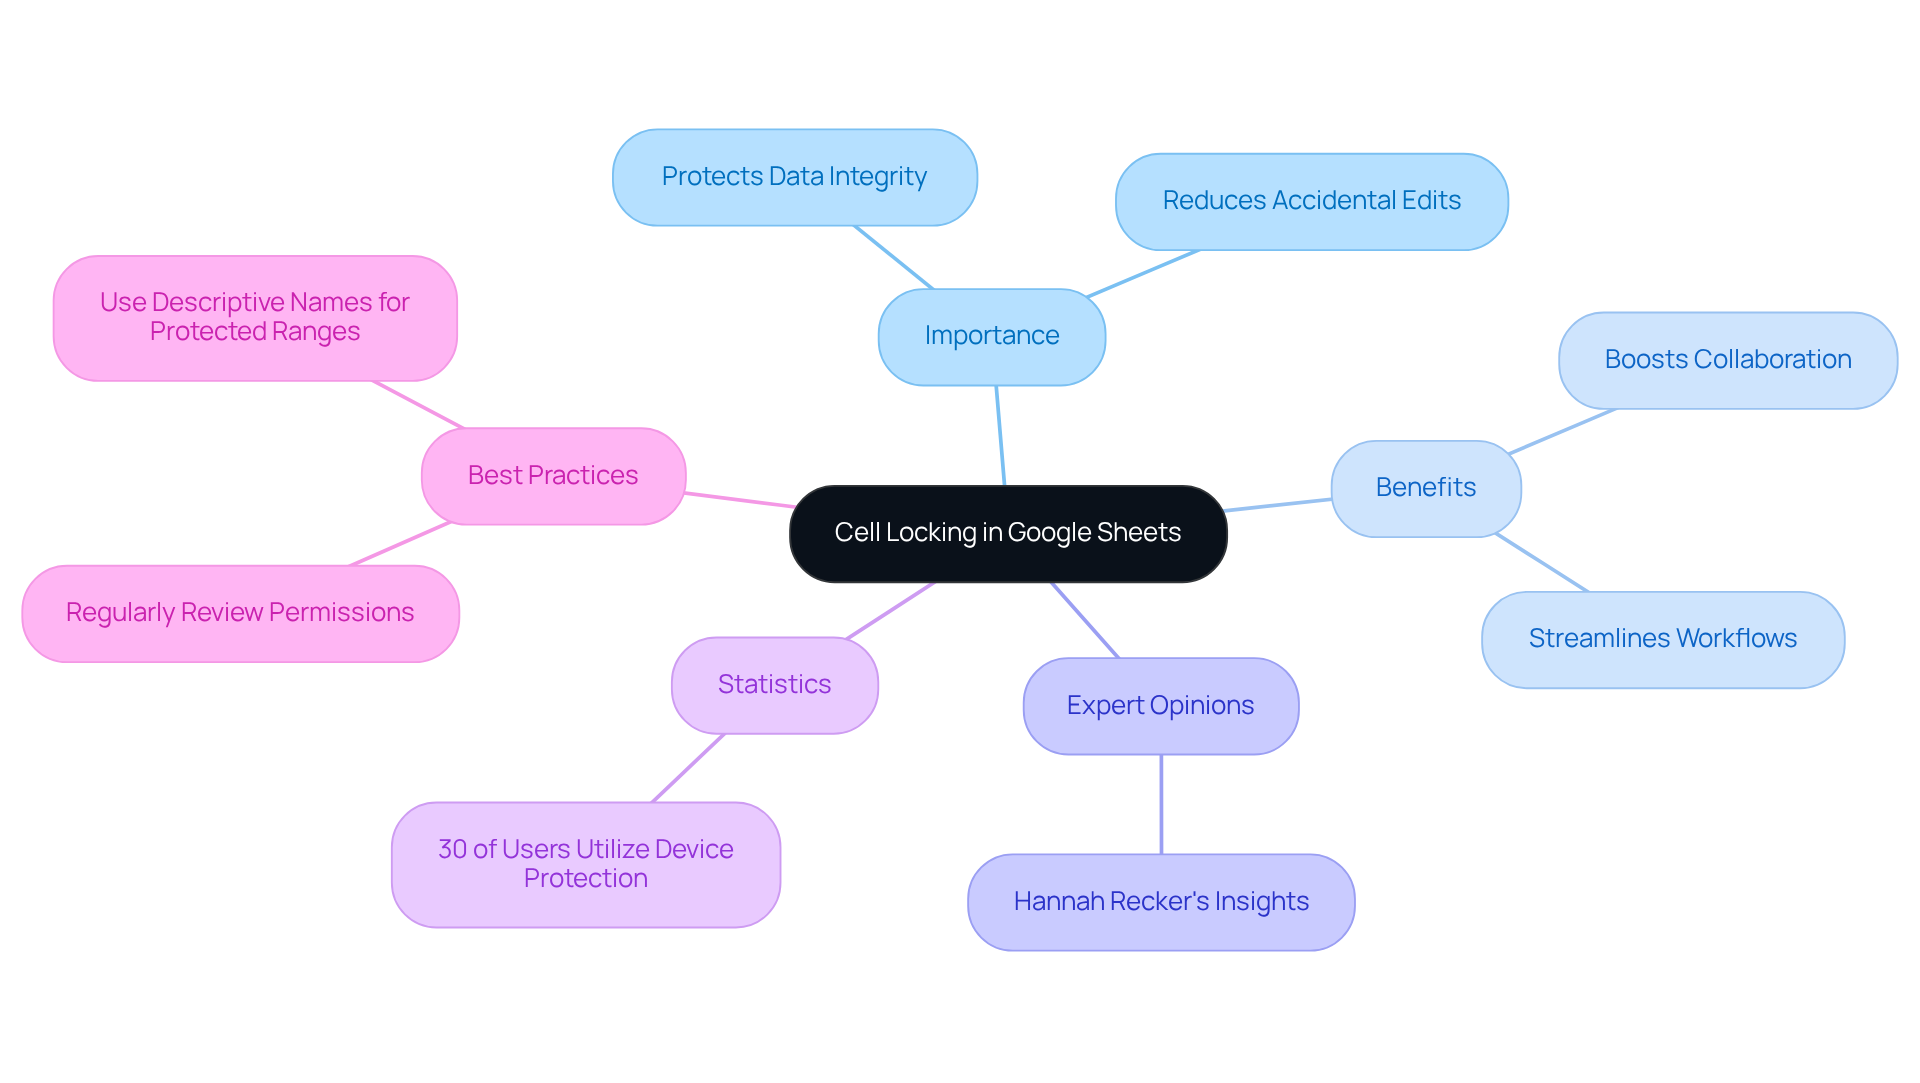
You might be wondering why the feature that allows you to google sheets lock cells from editing is such a big deal. Well, it’s a crucial feature that helps protect specific areas from unauthorized changes, which is super important when you’re working with a bunch of people on the same document. By using locking mechanisms, teams can avoid those pesky accidental edits to vital information, ensuring that everything stays accurate and reliable. This practice not only boosts the integrity of your data but also makes collaboration smoother, reducing the chances of mistakes that can happen when someone accidentally changes something.
In fact, did you know that nearly 30% of users in teamwork settings use device protection to keep their data safe? Using clear names for protected ranges makes it easier to manage, allowing teams to quickly spot which areas are locked down. For instance, companies like Caterpillar use PostgreSQL to manage product lifecycle data, showing just how important accuracy is for making smart operational decisions. The ability to google sheets lock cells from editing serves a similar purpose, allowing teams to focus on their work without worrying about unintentional changes.
Experts in data integrity really recommend locking mechanisms as a best practice for collaborative tools. Take Hannah Recker, for example—a growth marketer with plenty of experience in data-driven strategies. She points out that 'locking elements with formulas preserves the precision and dependability of calculations.' By clearly marking which fields can be edited, teams can streamline their workflows and keep their data management organized. Plus, regularly reviewing permissions helps adapt to any changes in projects or teams, ensuring that only the right people have edit access.
Overall, the benefits of using Google Sheets lock cells from editing go beyond just keeping things safe; they create a collaborative environment where team members can work with confidence, knowing that their essential data is protected.
Explore Methods to Lock Cells
Do you want to learn how to google sheets lock cells from editing? Here are some easy methods to keep your data safe:
-
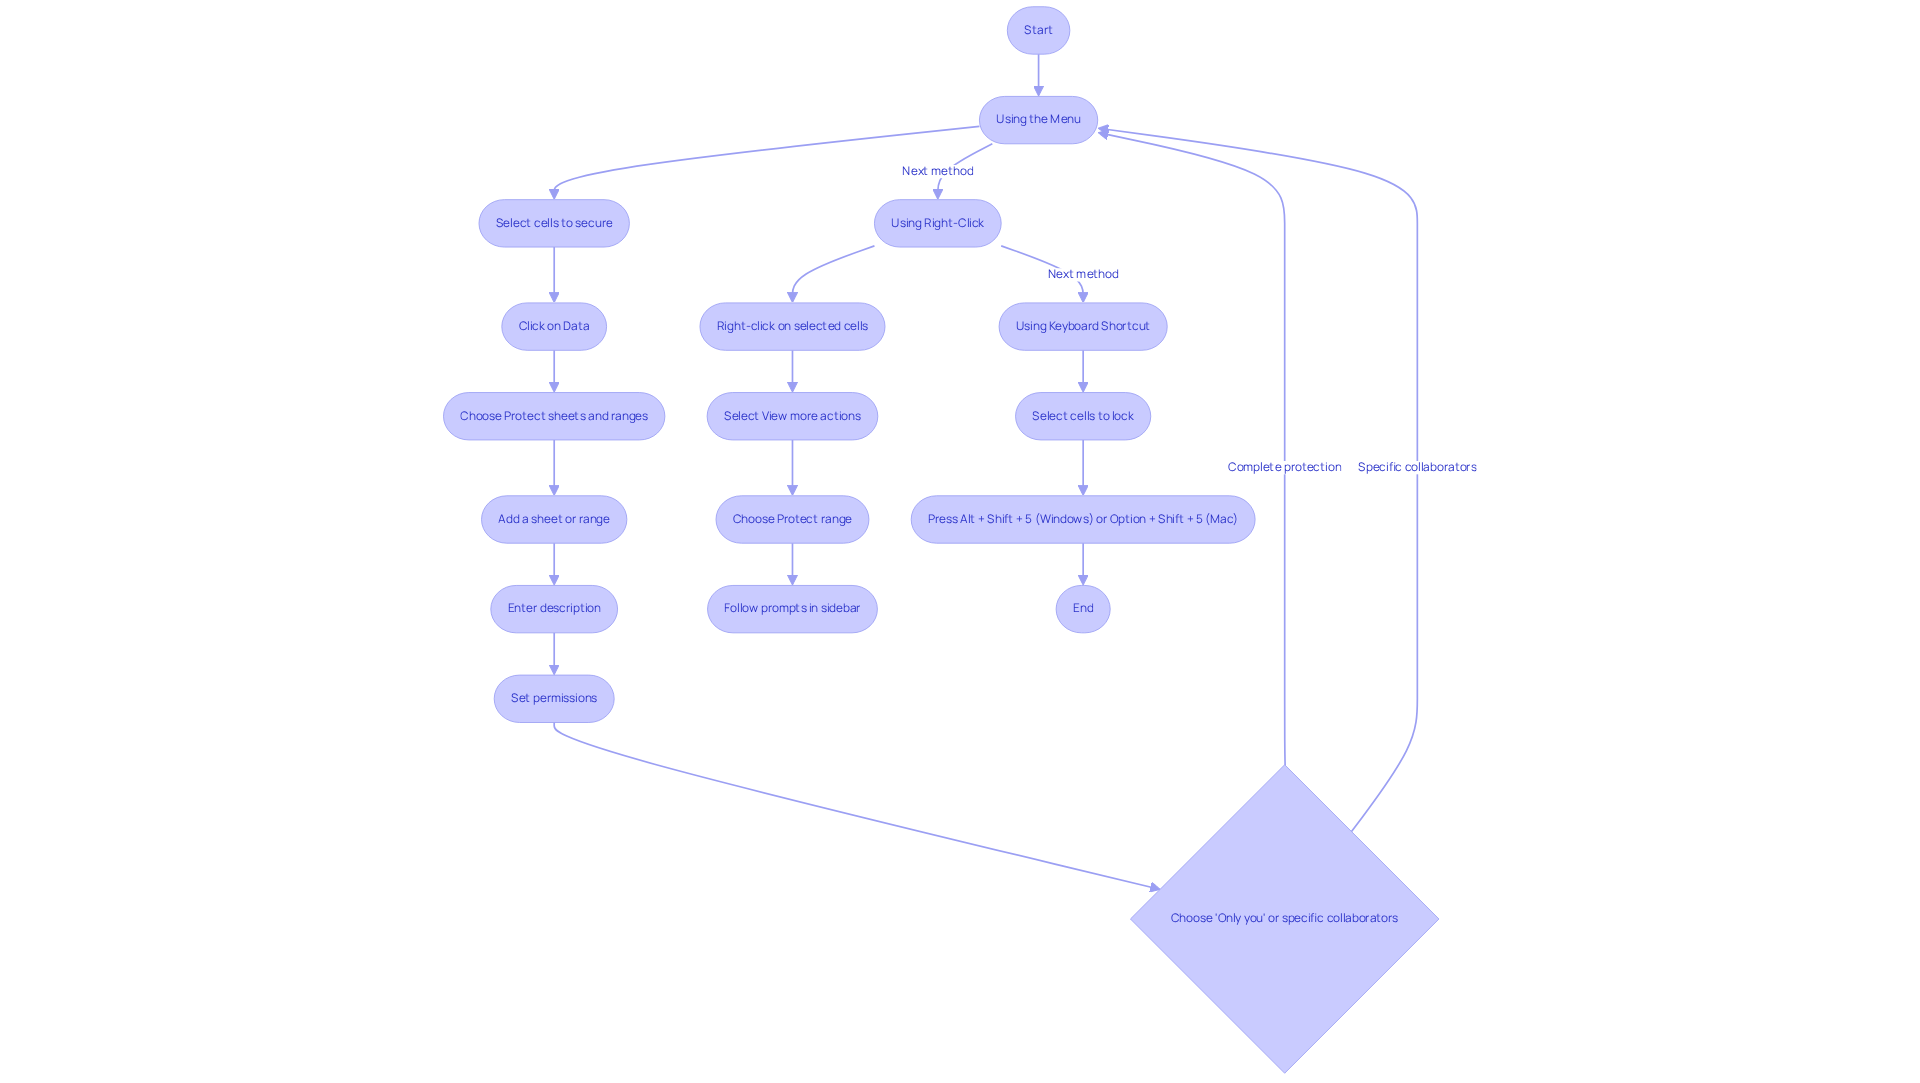
Using the Menu:
- Start by opening your Google Sheets document.
- Next, select the individual cell or range of cells you want to secure.
- Click on
Datain the top menu, then chooseProtect sheets and rangesto google sheets lock cells from editing. - A sidebar will pop up on the right. Click
Add a sheet or range. - Enter a description and hit
[Set permissions](https://superjoin.ai/blog/how-to-lock-cells-in-google-sheets)to decide who can modify those locked areas when you use google sheets lock cells from editing. - You can choose 'Only you' for complete protection or allow specific collaborators for more flexibility when you use google sheets lock cells from editing.
-
Using Right-Click:
- Simply right-click on the selected cell or range.
- Choose
View more actions, then selectProtect range. - Follow the prompts in the sidebar to set your permissions.
- Just a heads up: if users try to change a protected area in Google Sheets, they'll see a warning message letting them know that the cells are secured, as Google Sheets lock cells from editing.
-
Keyboard Shortcut:
- Select the cells you want to lock, then press
Alt + Shift + 5(Windows) orOption + Shift + 5(Mac) to jump straight to the protection settings.
- Select the cells you want to lock, then press
These methods ensure that your sensitive information stays secure while still allowing your team to collaborate effectively. It’s a good idea to regularly check those permissions as your team changes. By following these practices, you can enhance your information management strategies and reduce the risk of unauthorized changes. After all, errors in data management can cost companies billions, making it crucial to protect your data integrity!
Set Permissions for Locked Cells
Once you’ve secured the areas you want, managing access to Google Sheets lock cells from editing becomes super important to control who can modify them. You might be wondering how to set permissions effectively—let’s break it down:
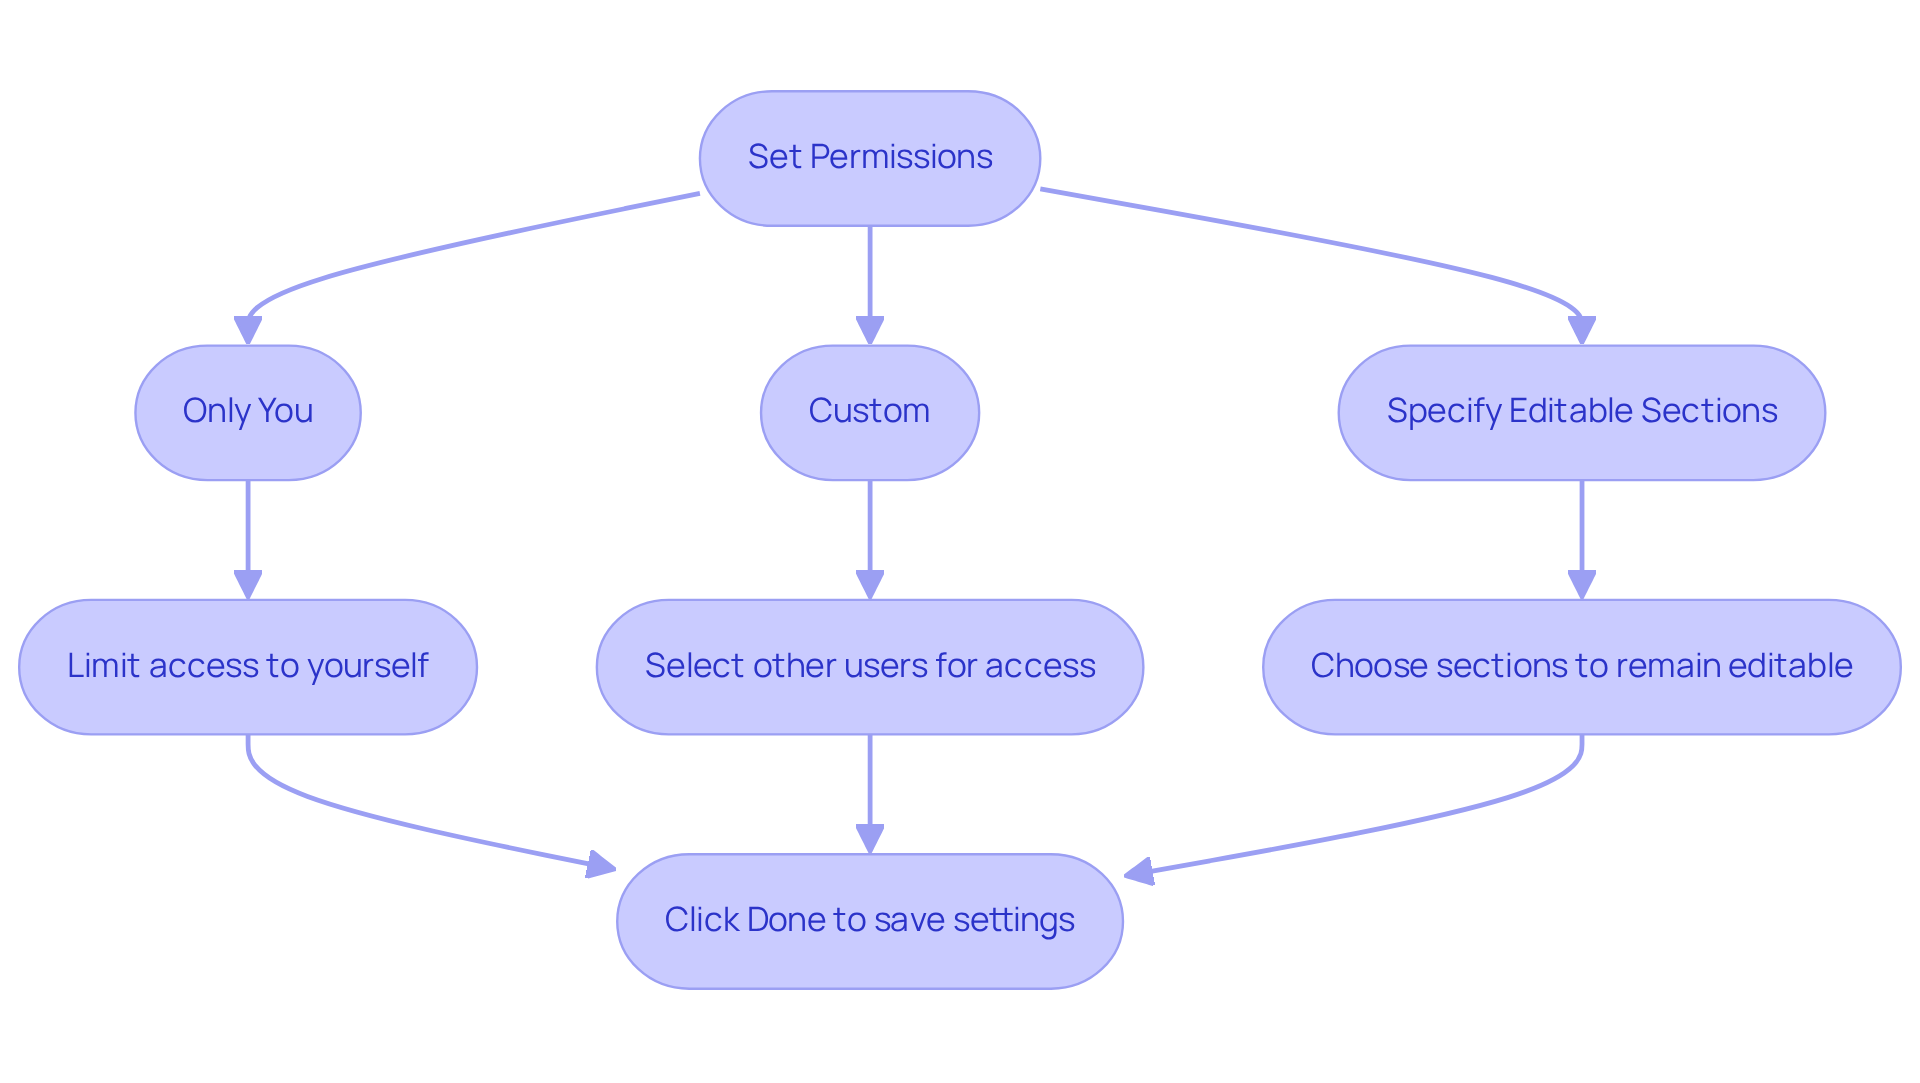
- After you hit
Set permissionsin the protection sidebar, you’ll see options to decide who gets to modify those locked areas. - Want to keep it simple? Select
Only youto limit access just to yourself. - If you want to share the love, go for
Customto pick other users who can make changes.
Now, if you’d like to allow specific users to modify while maintaining some restrictions, choose the option to google sheets lock cells from editing and specify which sections should remain editable. Once you’re happy with your choices, click Done to save your settings. This way, you’re not just safeguarding your info; you’re also enabling essential collaboration.
Securing these units not only protects vital information but also fosters effective teamwork by allowing authorized users to make necessary tweaks without compromising data integrity. And hey, regularly reviewing and adjusting these permissions can help you align access with your current project needs, ensuring a smooth collaborative process. So, how are you managing your access today?
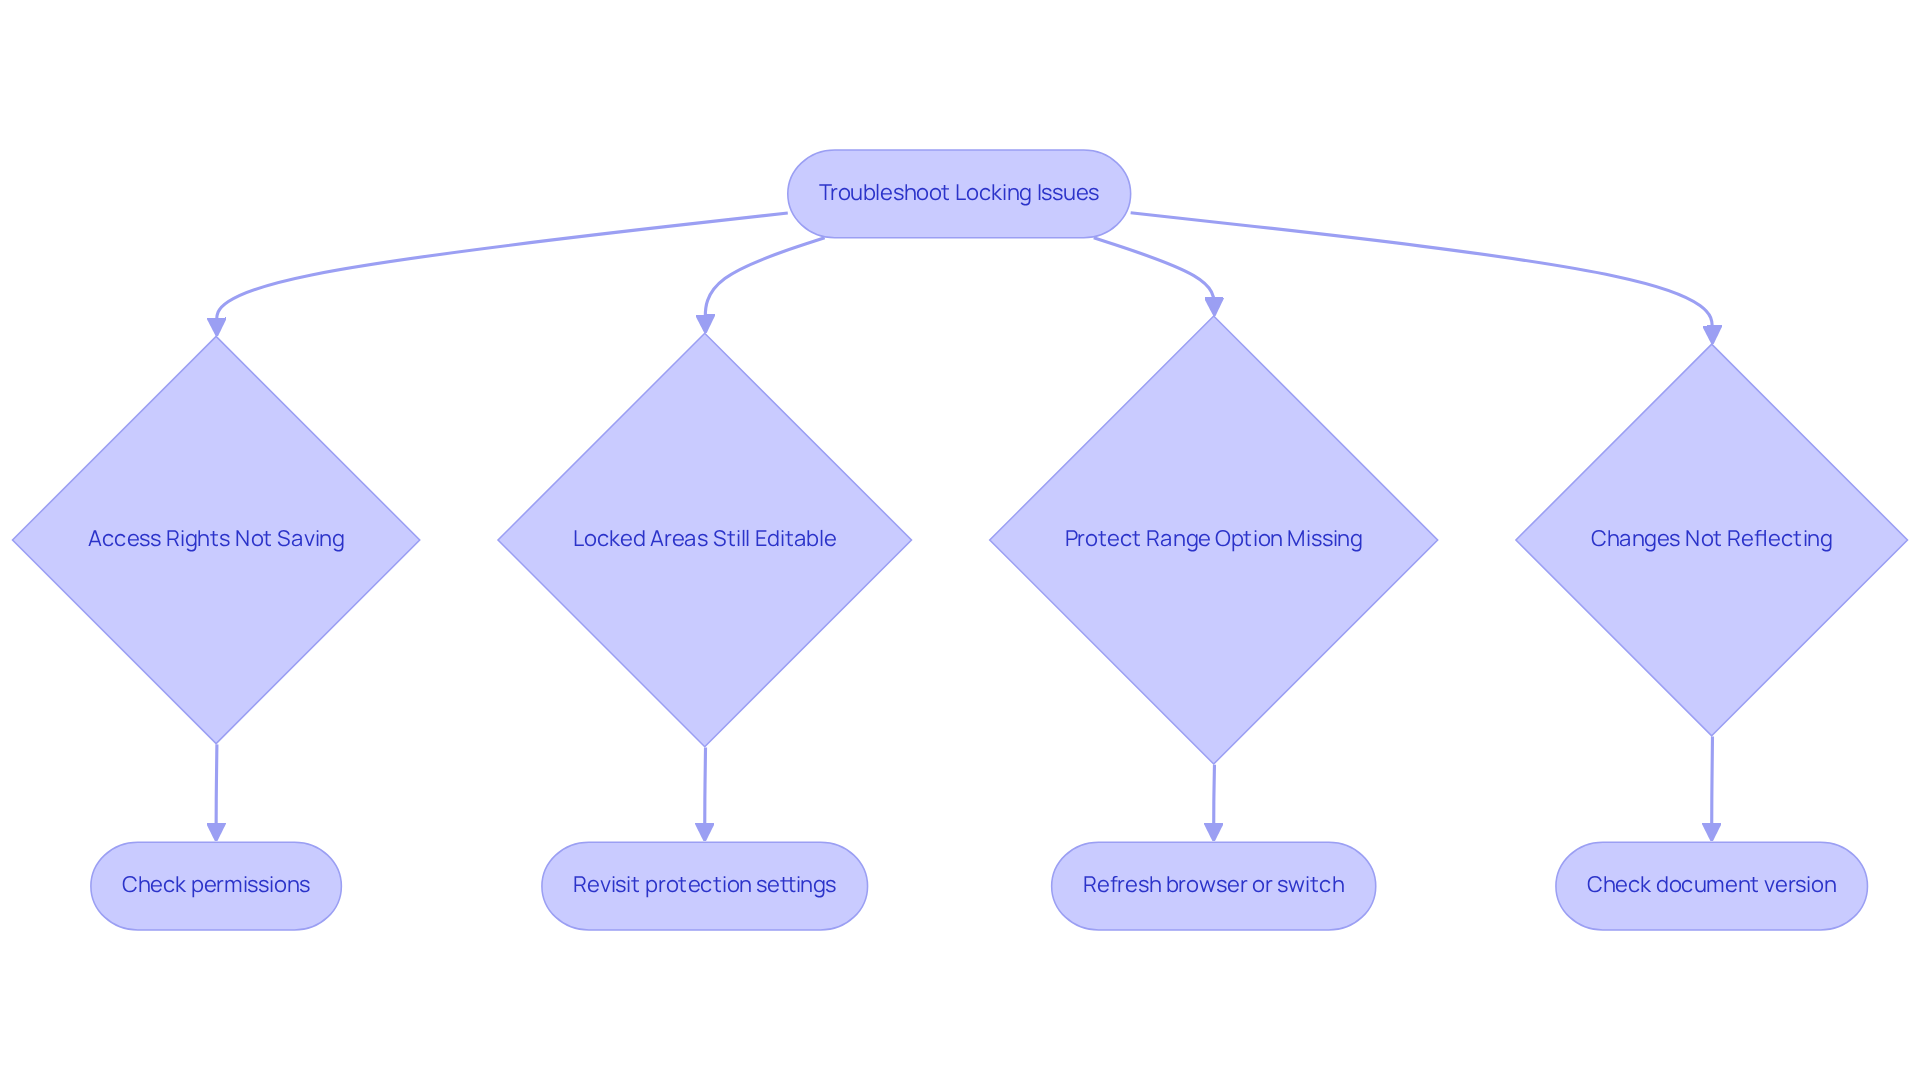
Troubleshoot Common Locking Issues
When you're facing challenges, you may be wondering how to google sheets lock cells from editing and what to do next. Let's explore some troubleshooting strategies together:
- Access Rights Not Saving: First things first, do you have the right permissions to edit the document? If you’re not the owner, you might need to ask for edit access to move forward. It's interesting to note that around 30% of users encounter issues related to access when trying to secure sections, highlighting how crucial it is to check those access rights.
- Locked Areas Still Editable: Have you checked the permissions for those locked areas? It’s worth revisiting the protection settings to make sure everything is configured correctly. Experts suggest double-checking these settings related to how Google Sheets lock cells from editing, as misconfigurations can lead to a lot of confusion among users.
- If you can’t find the
Protect rangeoption in order to google sheets lock cells from editing, try refreshing your browser or switching to a different one. Sometimes, those pesky browser extensions can mess with Google Sheets functionality. There was a case study with a mid-sized tech firm where switching browsers helped 45% of their team members resolve their locking issues, which just goes to show how effective this can be! - Changes Not Reflecting: If your changes to secured sections aren’t showing up, are you sure you’re looking at the right version of the document? Collaborators might be working on a different copy, which can lead to some frustrating discrepancies. This is a common issue, with about 25% of users reporting version control problems when collaborating in Google Sheets.
So, next time you run into these challenges, remember these tips and don't hesitate to explore further solutions!
Additional Tips for Effective Cell Locking
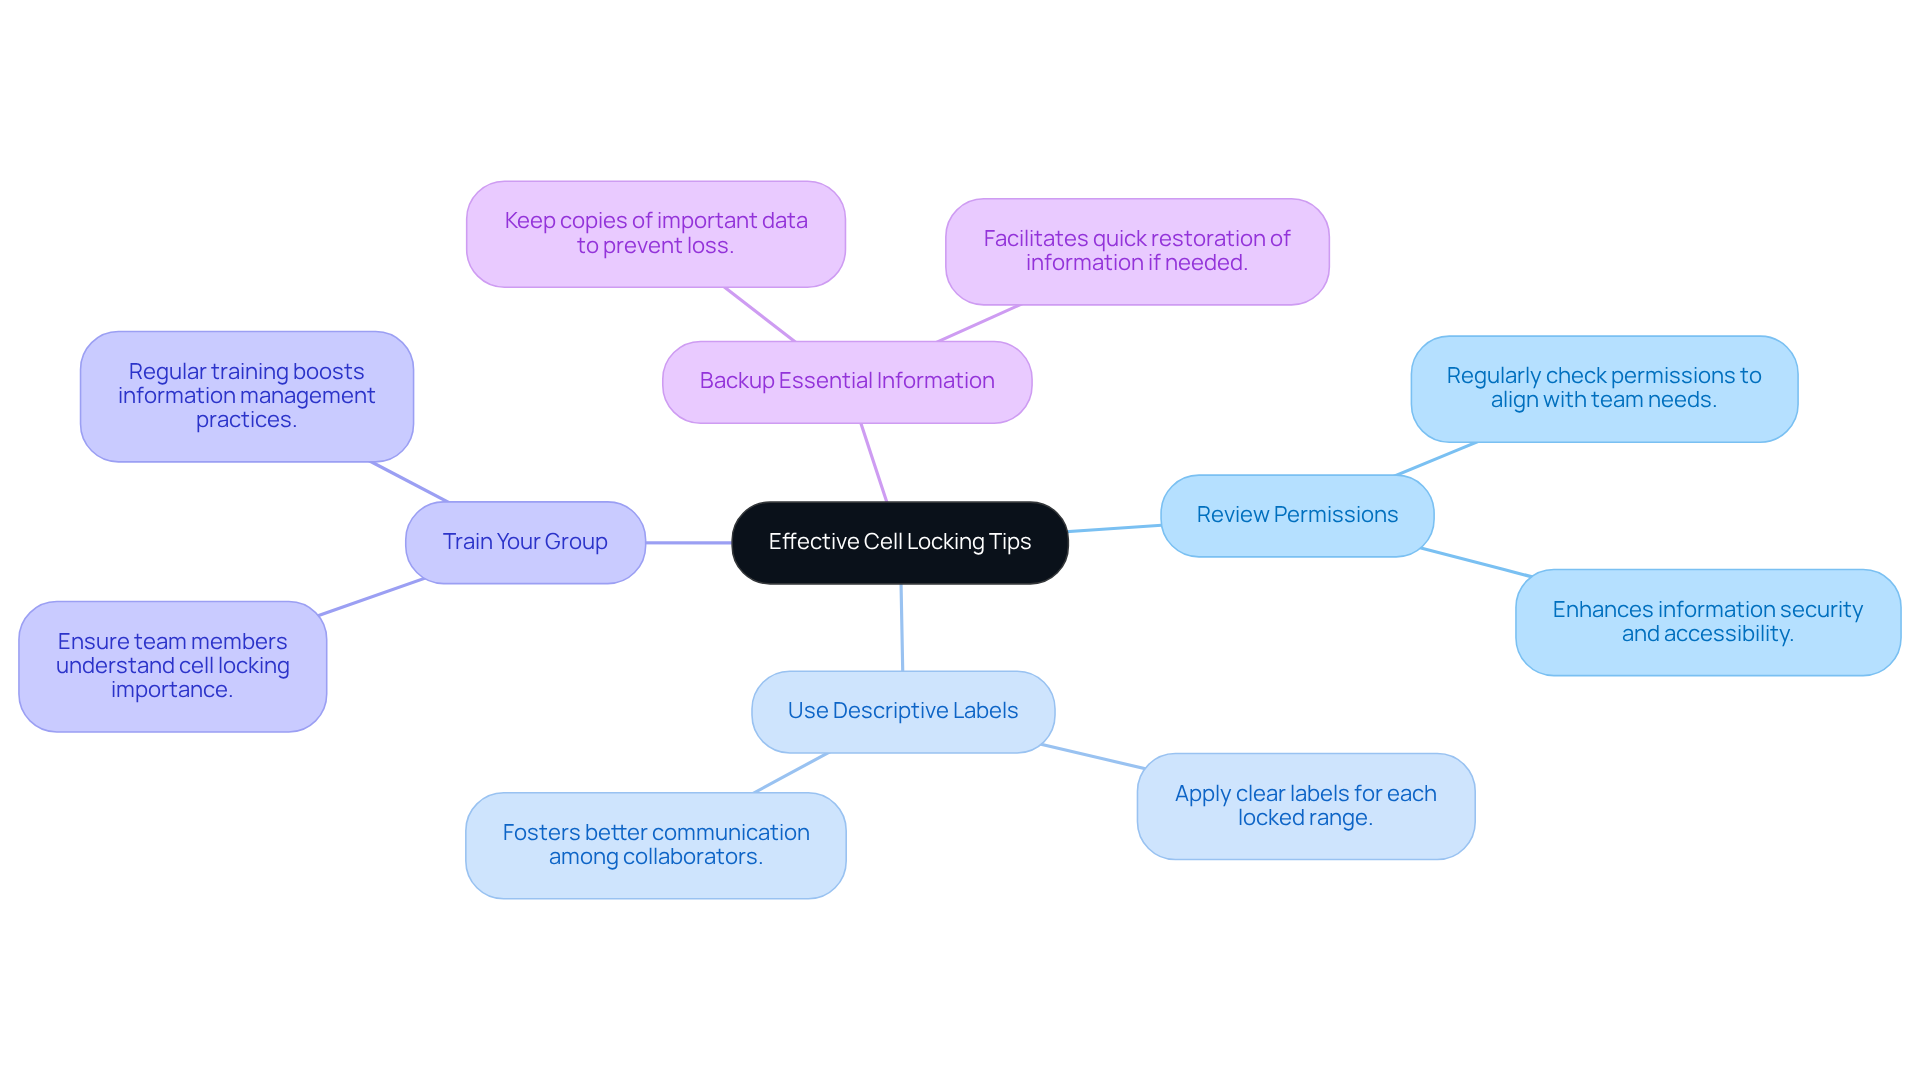
To optimize your experience with cell locking in Google Sheets, you might be wondering about some best practices to keep in mind:
- Regularly Review Permissions. It’s a good idea to check in on the permissions assigned to your locked cells every so often. This helps ensure they’re still in line with your team’s ever-changing needs. Plus, keeping a close eye on this can really help with information security and accessibility. Did you know that the global average cost of a data breach was a whopping $4.45 million in 2023? That really highlights how important strong information protection strategies are!
- Using Descriptive Labels. When you’re setting up protections, try to apply clear and descriptive labels for each range. This little trick can make a big difference, as it helps your collaborators understand what each locked cell is all about, fostering better communication and teamwork.
- Train Your Group. You want to make sure everyone on your team knows how to use the locking feature and why it’s so important to protect sensitive information. Regular training sessions can really boost your overall information management practices. Experts agree that teaching teams about information security is key to maintaining integrity in collaborative environments.
- Backup Essential Information. Always keep a copy of important data just in case something gets accidentally changed or deleted, even if those sections are locked. This precaution means you can quickly restore information if needed. A case study on 'Understanding Cell Locking in Google Sheets' illustrates how to google sheets lock cells from editing, which helps maintain data integrity by preventing unauthorized edits, a critical aspect of effective data management. So, what do you think? Ready to put these tips into action?
Conclusion
You might be wondering why implementing cell locking in Google Sheets is so crucial. Well, it’s not just a technical skill; it’s an essential practice for keeping your data safe and ensuring smooth collaboration. By learning how to lock cells and set the right permissions, you can protect important information from unwanted changes, making sure your team is always working with reliable data. This feature really shines in collaborative settings, where accidental edits can throw a wrench in your plans.
Throughout this article, we’ve explored various methods for locking cells—like using the menu, right-click options, and handy keyboard shortcuts. Each of these approaches lets you tailor your experience and effectively safeguard sensitive information. Plus, we highlighted the importance of regularly reviewing permissions and using clear labels, which not only boosts communication but also helps everyone on the team know what’s locked and what’s not.
In a world where data accuracy is everything, being able to lock cells in Google Sheets is a game-changer. By adopting these strategies and best practices, you can protect your data while fostering an environment of trust and collaboration. So, why not embrace these cell locking features? They’ll empower you to manage your information with confidence, leading to smoother workflows and smarter decision-making. Let’s keep the conversation going and explore how these tools can work for you!
Frequently Asked Questions
Why is cell locking in Google Sheets important?
Cell locking is crucial for protecting specific areas from unauthorized changes, which helps maintain the accuracy and reliability of data when multiple people collaborate on the same document.
How does locking cells improve collaboration?
Locking cells reduces the chances of accidental edits to vital information, allowing teams to work with confidence and focus on their tasks without worrying about unintentional changes.
What percentage of users in teamwork settings utilize device protection?
Nearly 30% of users in teamwork settings use device protection to keep their data safe.
What are some best practices for locking cells in Google Sheets?
Best practices include using clear names for protected ranges, regularly reviewing permissions, and marking which fields can be edited to streamline workflows and maintain organized data management.
What methods can I use to lock cells in Google Sheets?
You can lock cells using the menu, right-click options, or keyboard shortcuts: - Using the Menu: Select the cells, click on Data, choose Protect sheets and ranges, then set permissions. - Using Right-Click: Right-click the cells, select View more actions, then Protect range, and set permissions. - Keyboard Shortcut: Select the cells and press Alt + Shift + 5 (Windows) or Option + Shift + 5 (Mac) to access protection settings.
What happens if someone tries to edit a protected cell in Google Sheets?
If users attempt to change a protected area, they will see a warning message indicating that the cells are secured.
Why is it important to regularly check permissions in Google Sheets?
Regularly checking permissions helps adapt to changes in projects or teams, ensuring that only the right people have edit access, which is vital for maintaining data integrity.
👍
What others are liking
5 Steps to outline your ideal documentation structure
5 MINS READ
Where to start the your journey of mapping out your ideal documentation structure, aligning it with the very heartbeat of your organization?
Defining a winning level of detail in your process
3 MINS READ
What is too much detail, and what is too little? This article described in that winning level detail about what detail is enough.


