Overview
You might be wondering how to really make your lume video setup shine, right? Well, this article breaks down four essential steps to optimize your setup for success. It highlights just how crucial professional lighting is for boosting visibility and keeping your viewers engaged during video calls. You’ll find practical tips on:
- Selecting and positioning your lighting gear
- Tweaking brightness and color temperature
- Testing your setup to nail that polished and professional look
Trust me, it can make a big difference in how effectively you communicate!
Key Highlights:
- Professional lighting, such as lume video, enhances visibility and reduces shadows for a polished appearance during video calls.
- Good lighting conveys professionalism and boosts viewer engagement, making communication more effective.
- Essential lighting equipment includes a key light for the face, fill illumination to soften shadows, a backlight for depth, and illumination diffusers for a flattering look.
- Position the key light at a 45-degree angle above eye level, with fill light on the opposite side at lower intensity, and backlight aimed at shoulders or head.
- Avoid overhead lights to prevent unflattering shadows and test your setup before important calls.
- Adjust brightness and color temperature (5000K to 6500K) for natural daylight effects, and experiment with camera settings and angles for the best results.
Introduction
In the world of virtual communication, you might be wondering just how crucial professional lighting really is. With video calls becoming a regular part of our lives, the way you look on camera can significantly impact how you come across—think professionalism and confidence. Good lighting does more than just brighten your face; it helps reduce those pesky shadows and makes it easier for viewers to connect with you.
So, let’s dive into the essentials of optimizing your video call lighting! We’ll cover everything from the right gear to how to position and tweak your setup for maximum effect, ensuring that every virtual meeting leaves a memorable impression.
Understand the Importance of Professional Lighting in Video Calls
You might be wondering why professional illumination, specifically lume video, is so crucial for video calls. Well, it’s simple: how you appear on camera can make a big difference! Effective lighting, such as that provided by a lume video, not only boosts your visibility but also helps to reduce those pesky dark areas, giving you a more polished look. On the flip side, poor lighting can leave you looking faded or shadowy, making it tough for your viewers to focus on what you’re saying. Plus, a well-lit environment enhances your lume video presence, which screams professionalism and confidence—qualities that can really shape how others perceive your expertise during meetings. Let’s break it down:
- Visibility: Make sure your face is well-lit to avoid that dark, shadowy vibe.
- Professionalism: Good lighting shows you’re serious about quality communication.
- Engagement: When you’re well-lit, viewers are more likely to engage with you, which boosts interaction and collaboration.
Now, let’s dive into how you can achieve that perfect lighting!

Gather Essential Lighting Equipment for Your Setup
To achieve the best lighting for your lume video calls, you’ll want to gather a few key pieces of equipment. First up, the Key Light—this is your main light source that should shine on your face. Softboxes or LED panels work great for creating that even glow in a lume video. Next, think about Fill Illumination. This light helps to reduce any shadows that your key light might create. An extra softbox or even a ring light can do the trick nicely.
Don’t forget about the Backlight! Placing a light behind you can really help separate you from your background, adding some depth to your lume video. A small LED bulb is a perfect choice for this.
Now, let’s talk about Illumination Diffusers. These handy tools, such as lume video, soften harsh brightness and give you a more flattering look. You can use softboxes or even DIY solutions like white bedsheets if you’re feeling crafty.
Lastly, grab a Tripod or Stand. This will help you position your lights at just the right height and angle, keeping everything stable and adjustable as needed.

Position Your Lighting for Maximum Effectiveness
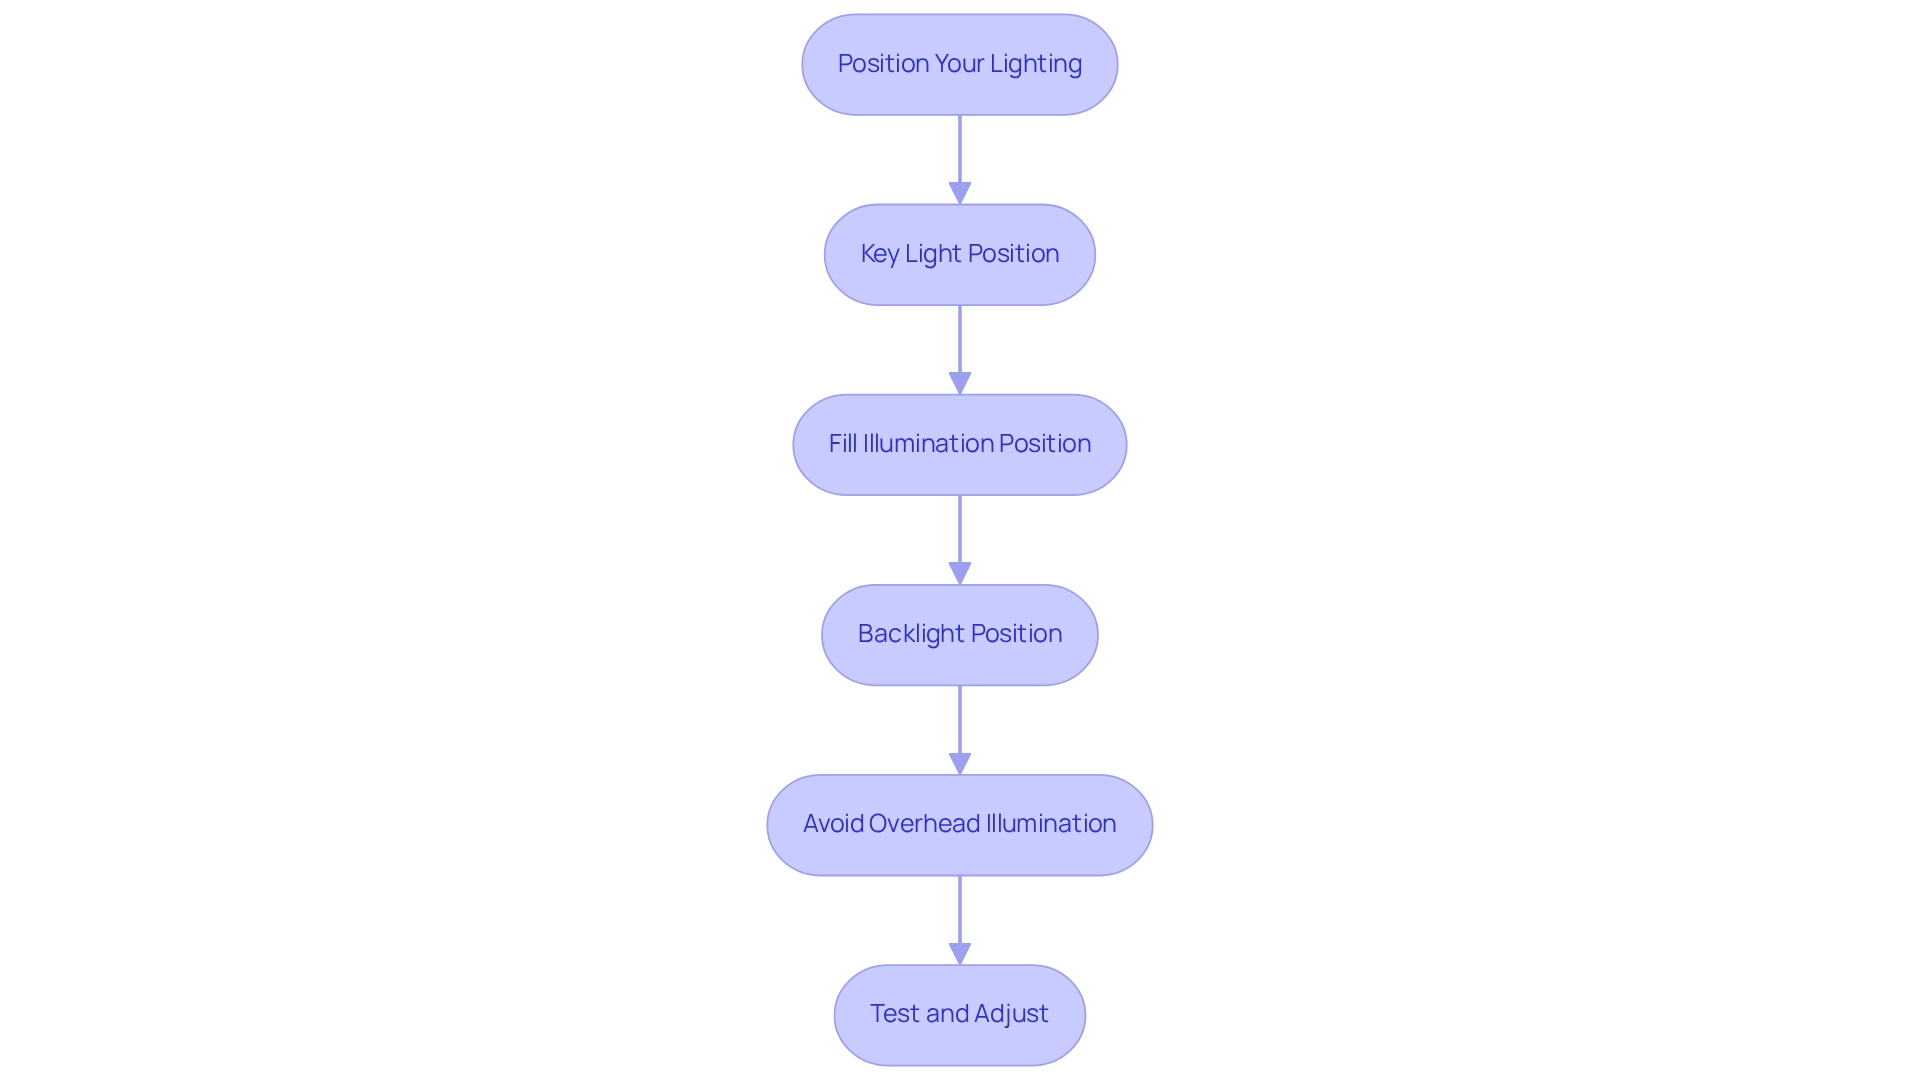
Getting your lighting just right for the lume video is super important for the best results! You might be wondering how to do that, so here are some friendly tips to guide you:
- Key Light Position: First off, place your key light at a 45-degree angle to your face, just a bit above eye level. This setup gives you that natural look and helps reduce any pesky dark spots.
- Fill Illumination Position: Next, put the fill light on the opposite side of your key light, but keep it at a lower intensity. This way, it softens the contrasts without stealing the show from your key light.
- Backlight Position: Now, let’s talk about the backlight. Position it behind you, aimed at your shoulders or head. This creates a nice separation from the background, but make sure it’s not too bright—nobody wants glare ruining their shot!
- Avoid Overhead Illumination: Oh, and steer clear of overhead lights! They can cast unflattering shadows on your face. Instead, stick with the lights you’ve positioned for a more flattering glow during your lume video sessions.
- Test and Adjust: Lastly, don’t forget to test your lume video setup before those important calls! Make adjustments based on how everything looks on camera.
So, what do you think? Feel free to play around with these tips and see what works best for you!

Adjust Lighting Settings for Optimal Results
Once you’ve got your lume video illumination set up, it’s time to tweak those settings for the best results! You might be wondering what adjustments are necessary. Let’s dive into it:
- Brightness: Make sure to adjust the brightness of each light source. For lume video, you want your face to be well-lit, but not washed out. If you have dimmers, now's the time to use them!
- Color Temperature: Aim for a color temperature between 5000K and 6500K. This range mimics natural daylight and helps keep your skin tones looking great and colors accurate.
- Camera Settings: If your camera allows it, play around with the exposure settings to enhance your lighting. If things are looking a bit too bright in the lume video, reducing the exposure can really help.
- Test Different Angles: Don’t be afraid to experiment! Try different angles and distances to find the most flattering setup. Snap a few test shots to see how the lighting looks on camera for your lume video, and make sure to monitor the lighting during calls. If you notice any changes in natural light or shadows creeping in, adjust your lights as needed.
Remember, finding the right setup might take a little time, but it’s totally worth it for that perfect look!

Conclusion
You know, mastering professional lighting for video calls is super important if you want to create an impactful virtual presence. Think about it: good lighting not only enhances visibility but also reduces those pesky shadows and gives off a professional vibe. When your face is well-lit, you’re not just improving your communication quality; you’re also boosting viewer engagement, making it easier for everyone to connect with you.
Now, let’s talk about equipping your setup with the right tools—like key lights, fill lights, and backlights. These are essential for achieving the best results. Positioning these lights effectively can make your appearance on camera look natural and flattering. Plus, adjusting settings like brightness and color temperature can really take your video quality up a notch, helping you to present a polished and professional image.
Ultimately, putting in the time and effort to optimize your lighting for video calls can really elevate the impression you leave on your audience. As virtual communication becomes more vital in professional interactions, prioritizing your lighting setup is a key step toward enhancing your overall presence and effectiveness in every meeting. So, what are you waiting for? Let’s brighten up those calls!
Frequently Asked Questions
Why is professional illumination, specifically lume video, important for video calls?
Professional illumination, like lume video, is crucial for video calls because it significantly affects how you appear on camera. Good lighting enhances visibility, reduces dark areas, and creates a polished look, while poor lighting can make you look faded or shadowy.
How does effective lighting improve visibility during video calls?
Effective lighting ensures that your face is well-lit, eliminating dark or shadowy vibes that can distract viewers and make it difficult for them to focus on what you’re saying.
What impact does good lighting have on professionalism during video calls?
Good lighting demonstrates that you are serious about quality communication, which enhances your professionalism and the overall impression you make during meetings.
How does proper lighting influence viewer engagement?
When you are well-lit, viewers are more likely to engage with you, leading to increased interaction and collaboration during video calls.
What are the key benefits of good lighting during video calls?
The key benefits of good lighting during video calls include improved visibility, enhanced professionalism, and increased viewer engagement, all of which contribute to more effective communication.
👍
What others are liking
5 Steps to outline your ideal documentation structure
5 MINS READ
Where to start the your journey of mapping out your ideal documentation structure, aligning it with the very heartbeat of your organization?
Defining a winning level of detail in your process
3 MINS READ
What is too much detail, and what is too little? This article described in that winning level detail about what detail is enough.


