
Key Highlights
- To record videos on Windows 10, use the built-in Xbox Game Bar, activated by pressing
Windows + G. - The Camera app allows users to record videos using their webcam by searching for 'Camera' in the Start menu.
- For advanced recording needs, third-party software like OBS Studio or Bandicam is recommended for more flexibility and editing options.
- Ensure a working microphone is connected for audio capture, and use headphones to minimise audio feedback.
- To set up video recording software, open the app, configure settings, select the recording area, test the setup, and adjust quality settings for optimal output.
- Begin recording by pressing
Win + Alt + Rwith Xbox Game Bar, and monitor the capture timer until finished. - After recording, clips are saved in the 'Videos' folder under 'Captures'.
- For editing, use software like Windows Video Editor, DaVinci Resolve, or Adobe Premiere Pro to trim, add effects, and export the final video.
- The video editing software market is growing, indicating increasing demand for effective editing tools.
Introduction
You might be wondering how to record videos on your laptop running Windows 10. Well, let me tell you, it can open up a whole new world of creative possibilities! Whether you’re into gaming, tutorials, or presentations, this guide is here to help you navigate the ins and outs of capturing high-quality footage without breaking a sweat.
But here’s the thing: with so many software options and settings out there, how do you ensure a smooth recording experience? Don’t worry! We’ll tackle those common pitfalls together and make sure you’re all set to create some amazing content.
Identify Required Tools for Video Recording on Windows 10
If you're looking for how to , you’ll want to have a few essential tools at your fingertips.
First up, there’s the . This handy feature is built right into Windows 10, and you can activate it by pressing Windows + G. It’s super popular among users who prefer built-in solutions for screen capturing. But, just a heads up, it does have its limits - it can’t record desktop activity or specific areas of your screen.
Next, if you want to know how to using your webcam, the is your go-to. Just search for 'Camera' in the Start menu, and you’re all set!
Now, if you’re after something a bit more advanced, consider downloading third-party software like OBS Studio or Bandicam for tips on how to . These tools offer greater flexibility and editing options, perfect for those who want more than what the built-in features can provide. Tech experts often recommend these for their robust capabilities and user-friendly interfaces.
Don’t forget about your microphone! If you plan to capture audio along with your video, make sure you’ve got a working mic connected to your laptop for clear sound. If you run into - like no sound or laggy performance - check your and close any unnecessary background apps.
And hey, using headphones while recording can really help cut down on audio feedback, giving you a cleaner sound track.
Before you dive into the documentation process, just double-check that all your tools are set up and working properly. It’ll make your recording experience so much smoother!

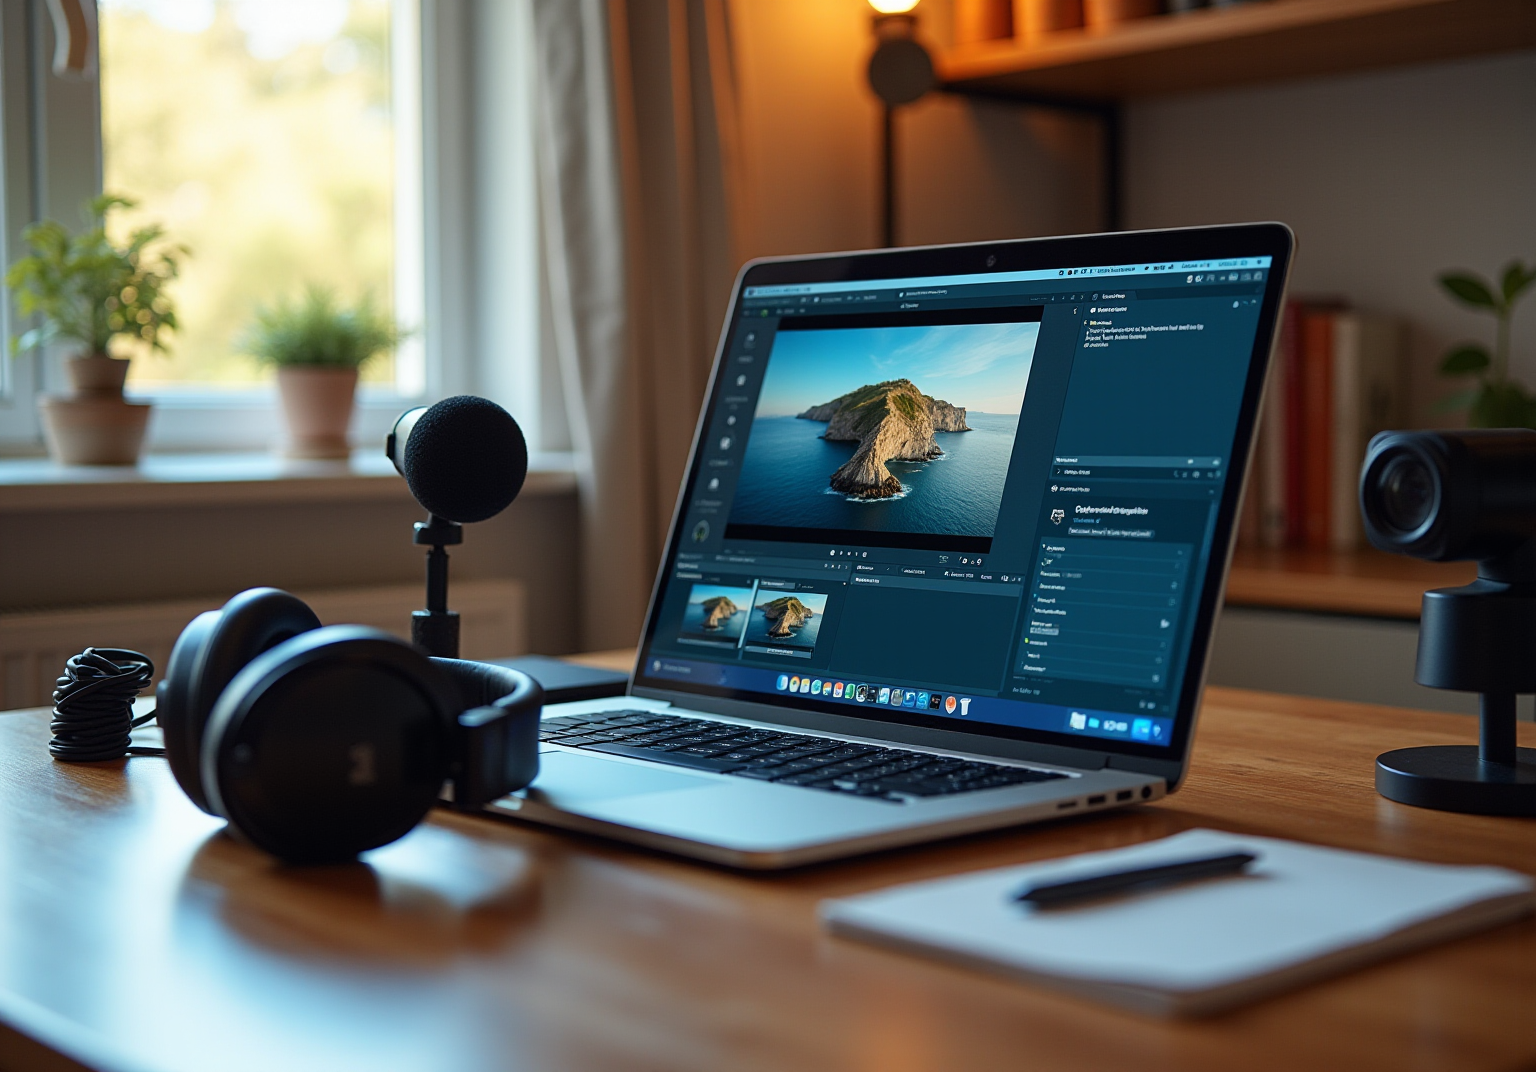
Set Up Your Video Recording Software
Setting up your ? Let’s make it easy! Here’s how you can get started:
- Open the Software: First things first, launch the Xbox Game Bar by pressing
Windows + G. If you’re using third-party software, just grab it from the Start menu. - Configure Settings: Now, click on that little (you know, the gear icon) in the Game Bar. This is where you can tweak your preferences. Don’t forget to check your - make sure they capture both system sounds and your microphone if you need it. Fun fact: Sarah Hollenbeck, Content Marketing and SEO Manager, mentions that "." So, getting your setup right is pretty crucial!
- Select : If you’re using third-party tools, you’ll want to choose what part of your . Are you going for the whole screen or just a specific window? These days, a lot of folks are opting for .
- Test Your Setup: Here’s a pro tip: do a quick . Record a short clip and play it back to check the quality. Companies like [Example Company] have really nailed their capturing settings to ensure top-notch outputs, which can be a great benchmark for you.
- Adjust : For the best results, aim for a resolution of at least 1080p and a frame rate of 30 fps or higher, depending on what your hardware can handle. This aligns with the trend among Windows 10 users who are increasingly prioritizing higher for their captures.
With these configurations all set, you’re ready to start capturing! Happy recording!

Execute the Video Recording Process
Are you ready to find out how to ? Let’s walk through how to together!
- Begin Capturing: Just hit
Win + Alt + Rto kick off the recording with the . If you’re using some other software, simply click that 'Record' button. Do you know how to ? It's easy peasy, right? - Perform Your Task: Now, go ahead and do what you want to capture on your screen. Whether it’s a tutorial, some epic gameplay, or anything else, just let it flow!
- : Keep an eye on that timer popping up on your screen. It’s your buddy, making sure you’re capturing everything you need.
- Stop Capture: When you’re done, just press
Windows + Alt + Ragain to stop the recording. Or, if you prefer, click the . Whatever works for you! - Save Your Clip: Your will automatically land in the 'Videos' folder under 'Captures'. Don’t forget to check it out to make sure it recorded just right!
And there you have it! You’re all set to dive into . Happy recording!

Finalize and Edit Your Recorded Video
Ready to polish up that ? Let’s walk through some easy steps together:
- Open Video : You can use built-in apps like Windows Video Editor, or if you’re feeling adventurous, try out third-party options like DaVinci Resolve or Adobe Premiere Pro. They’re both super popular and packed with features!
- Import Your Clip: Load your into the of your choice. This is where the fun begins!
- Trim Unwanted Sections: Got some bits you don’t need? Use the trimming tool to snip away those unnecessary parts at the start or end of your clip. It’ll really help the flow!
- Add Effects and Text: Want to jazz things up? Throw in some transitions, text overlays, or even background music. These little touches can really boost viewer engagement.
- : Happy with your edits? Great! Now, in your favorite format (like MP4) and resolution. Just make sure to pick settings that balance quality and file size for the best viewing experience.
- Review the Final Product: Before you share it with the world, give your exported video a watch. Make sure everything looks and sounds just right!
By following these steps, you’ll have a polished video ready for sharing or presenting.
Now, here’s something interesting: the and is projected to grow to $5.13 billion by 2032. That’s a clear sign that are in high demand! As David Ch., Chief Editor at SendShort, points out, "The ." This really highlights how important visual content is becoming in business.
And hey, don’t forget about those cool features like . They can make your video even more engaging and accessible for your audience!

Conclusion
So, you’re ready to start recording videos on your Windows 10 laptop? Great choice! It’s actually a pretty straightforward process, especially when you’ve got the right tools and a bit of know-how. This guide has walked you through some essential features, like the Xbox Game Bar and the Camera app, plus some cool third-party software options that can really amp up your video game. By understanding how to set up, execute, and edit your recordings, you’re all set for a smooth video creation experience.
You might be wondering why it’s so important to tweak those settings for the best audio and video quality. Well, trust me, testing your setup before hitting that record button can save you a lot of headaches later on! And let’s not forget about the editing tools and techniques that can help polish your final product. With the demand for engaging video content on the rise, having these skills in your toolkit is more valuable than ever.
Ultimately, mastering video recording on Windows 10 opens up a whole new world of opportunities for you, whether you’re diving into personal projects or stepping into the professional realm. By following the steps in this guide, you can confidently embark on your video recording journey, creating content that not only looks great but also resonates with your audience. So, what are you waiting for? Let’s get started!
Frequently Asked Questions
What is the Xbox Game Bar and how can it be used for video recording on Windows 10?
The Xbox Game Bar is a built-in feature in Windows 10 that allows users to capture screen recordings. It can be activated by pressing Windows + G. However, it has limitations as it cannot record desktop activity or specific areas of the screen.
How can I record videos using my webcam on Windows 10?
You can record videos using your webcam by using the Camera app. Simply search for 'Camera' in the Start menu to access it.
What are some recommended third-party software options for video recording on Windows 10?
Recommended third-party software options include OBS Studio and Bandicam. These tools provide greater flexibility and editing options compared to built-in features, making them suitable for users looking for advanced capabilities.
Why is it important to have a microphone when recording videos?
Having a working microphone is essential for capturing clear audio along with your video. If you experience audio issues, such as no sound or lag, you should check your microphone settings and close any unnecessary background applications.
How can using headphones benefit my video recording?
Using headphones while recording can help reduce audio feedback, resulting in a cleaner sound track for your video.
What should I do before starting the recording process?
Before you begin recording, double-check that all your tools are properly set up and functioning. This will help ensure a smoother recording experience.
List of Sources
- Identify Required Tools for Video Recording on Windows 10
- Windows 10 has a built-in free screen recorder that you might not know about (https://betanews.com/commentary/windows-10-screen-recorder-ultility)
- How to Screen Record on Windows 10 & 11 | TechSmith (https://techsmith.com/blog/how-to-screen-record-on-windows-10)
- blog.invgate.com (https://blog.invgate.com/it-quotes)
- What's your go-to application for recording screen on Windows 10? - Software & Applications - Spiceworks Community (https://community.spiceworks.com/t/whats-your-go-to-application-for-recording-screen-on-windows-10/460874)
- Set Up Your Video Recording Software
- rev.com (https://rev.com/blog/video-marketing-statistics)
- Data Capture & Recording Settings | UXCam Help Center (https://help.uxcam.com/en/articles/10222482-data-capture-recording-settings)
- Video Editing Statistics And Facts By Market Share, Software, Demographics, And Trends (2025) (https://electroiq.com/stats/video-editing-statistics)
- Top 50 Filmmaking Quotes to Inspire - Indie Film Hustle (https://indiefilmhustle.com/filmmaking-quotes)
- 73 of the Best Quotes About Filmmaking — FILM CRUX (https://filmcrux.com/blog/best-filmmaking-quotes)
- Execute the Video Recording Process
- Average video length predicted to decline to 65 seconds in 2024 (https://bynder.com/en/press-media/bynder-reveals-video-length-set-to-decline)
- State of Video Report: Video Marketing Statistics for 2025 (https://wistia.com/learn/marketing/video-marketing-statistics)
- Video Length Stats: How Long Should Your Video Be? | Embryo (https://embryo.com/blog/video-length-stats)
- Video Content Statistics for 2025 | Videomagic (https://videomagic.ai/blog/video-content-statistics)
- 50 Video Consumption Trends You Can’t Ignore In 2025 (https://synthesia.io/post/video-statistics)
- Finalize and Edit Your Recorded Video
- 30+ AI Generated Video Editing Statistics for 2026 (https://gudsho.com/blog/video-editing-statistics)
- Video Editing Statistics And Facts By Market Share, Software, Demographics, And Trends (2025) (https://electroiq.com/stats/video-editing-statistics)
- Video Editing Software Market Statistics (2026) (https://sendshort.ai/statistics/video-editing-software)
👍
What others are liking


5 Steps to outline your ideal documentation structure
5 MINS READ
Where to start the your journey of mapping out your ideal documentation structure, aligning it with the very heartbeat of your organization?
Defining a winning level of detail in your process
3 MINS READ
What is too much detail, and what is too little? This article described in that winning level detail about what detail is enough.


